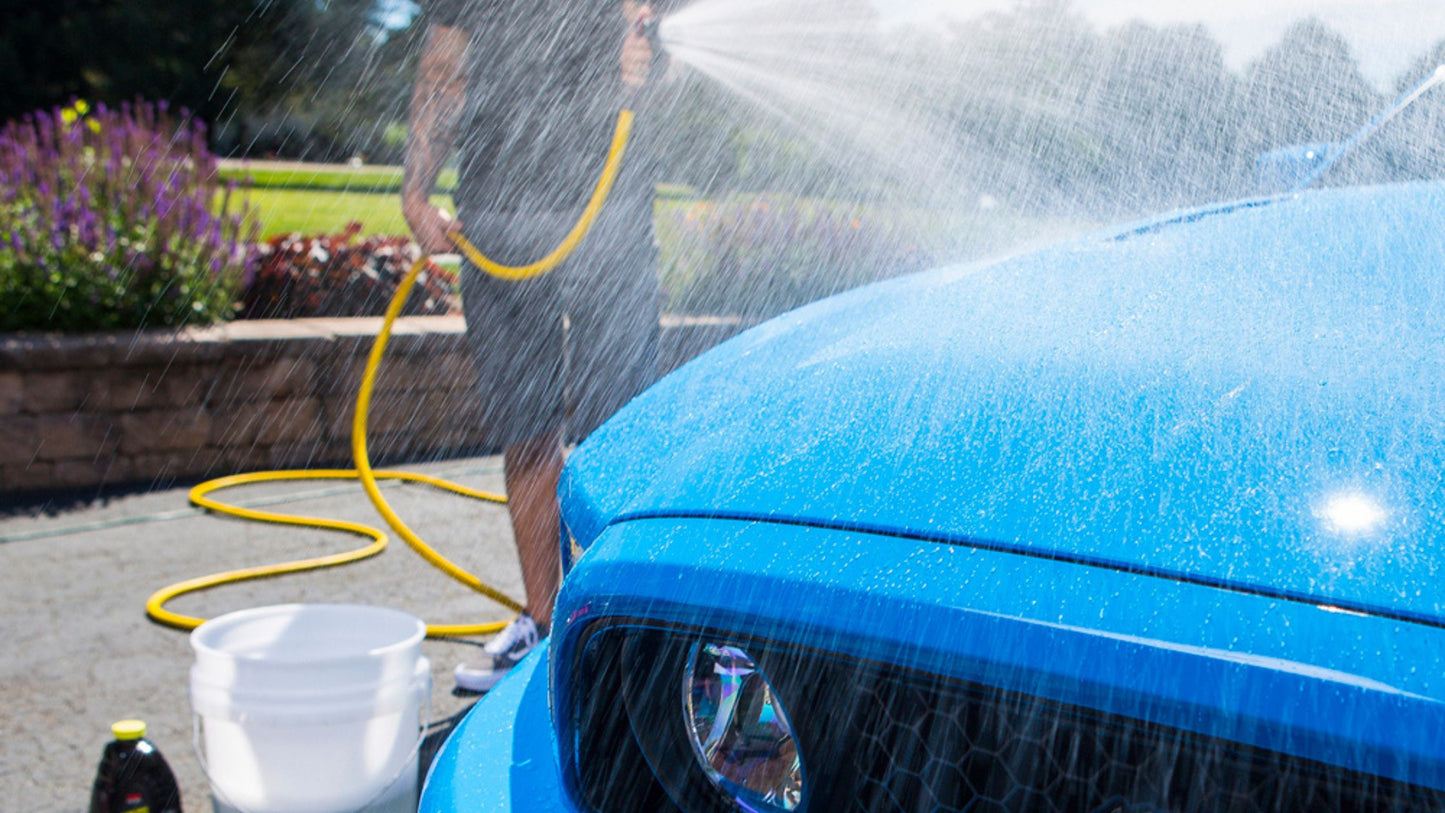
The average motorist washes their car to maintain its look, but did you know that regular washes are essential? Routine cleaning extends your car's lifespan, keeps your passengers safe, and saves you money in the long term. This post will share the steps of an effective exterior wash, including special considerations and practical techniques.
Here are the basic steps to effectively washing your car:
- Apply a wheel cleaner to the wheels to loosen up dust and debris.
- Fill up two buckets - One with soapy water and once with rinse water.
- Rinse your vehicle with water.
- Wash the exterior with car shampoo.
- Rinse any remaining soap.
- Dry the exterior.
- Apply a tire finish, removing any excess.
- Finish with wax or sealant on the paint.
- Detail auto glass and windshield areas.
Pre-cleaning considerations
Consider the following before applying any products.
Location, location, location
Before cleaning, select your wash site by picking an area with partial to full shade, especially if you’re working in warm conditions, as the sun and heat will prematurely dry soap or water and leave you with water spots. A partially shady site is ideal because it will provide enough light to see imperfections while ensuring that water will not evaporate too quickly.
Choose an area that has enough room to work and move around freely. Make sure that the space allows for proper drainage of water and soap.
Weather conditions
Temperature varies greatly depending on location and the season. As a guide, keep Stoner’s three ‘C’s in mind: cool, cloudy, and calm.
| COOL | CLOUDY | CALM |
|---|---|---|
| ➔ Avoid freezing or premature drying ➔ Aim for 55℉-80℉ ➔ This is the ideal threshold for most car care products! |
➔ The sun’s UV rays cause premature evaporation. ➔ Quick drying = water spots ➔ Cloudy is better! |
➔ Windy days cause products to blow on your vehicle’s surface. ➔ Wind = water spots and streaks ➔ Choose a calm day for outside washing. ➔ On windy days, wash in a garage or walled-off area. |
Tools & materials
To fully wash your car’s exterior, you’ll need:
Two-bucket wash system
Fill two buckets up with the proper ratio of car shampoo and water. Consult the back label of the wash you’re using if you’re unsure of what ratio you’ll need. Designate one bucket for washing and the other for rinsing to ensure that you will not reapply dirty water.
At least a dozen microfiber towels
You’ll find yourself constantly swapping through microfiber towels during any detailing job. We recommend having at least twelve clean microfibers for an exterior wash.
Microfiber cloths are excellent, reusable cleaning tools that require proper care. If you’re using older microfibers, ensure they haven’t been washed or dried incorrectly with fabric softener. For tips on properly caring for your microfiber towels, click here.
Car soap
Many people mistakenly believe that the strength of a cleaning product relates to its pH. Technically speaking, that is not true. Neutral pH cleaners will work for most general cleaning. While acidic cleaners remove most stubborn debris, things such as tar, sap, or other stains may require a concentrated soap – regardless of pH.

For reference, the table to the left shows the pH of everyday substances. The pH scale spans 0-14 to indicate whether a substance is acidic, neutral, or basic. A substance with a pH of 7 is neutral. Anything lower than 7 is acidic, with 0 being the most acidic, and anything higher than 7 is basic, with 14 being the most basic. For reference, the table below shows the pH of everyday substances.
Happily, you don’t have to be a chemist to wash your car. For a standard car wash, we recommend using pH-neutral car soap. Neutral soaps are gentle on your vehicle’s finish yet strong enough to remove everyday debris.
Soaps that register a low or acidic pH effectively break down more stubborn debris. However, if you use them, it is important to rinse them thoroughly to avoid damaging your car’s exterior.
In contrast, high pH or basic auto cleaning solutions won’t pose any risk to your vehicle. These cleaners are great for removing organic soils like bugs, grease, or bird droppings.
Hose
A standard garden hose will work well. If you don’t have access to a hose or running water outside, you can fill up a bucket to use for rinsing your vehicle.
Wash mitt
For a superior wash, we recommend purchasing a wash mitt. Microfiber towels work for applying car soap, but wash mitts can soak up more solution each time you dip them into your bucket. They’re also designed to attract grime and other debris.
Wheel cleaner
Wheels are susceptible to road grime, tar, and brake dust – all of which can be challenging to remove. Select a neutral-pH wheel cleaner for basic cleanings. Consider Stoner Car Care’s wheel cleaner for a safe, effective clean.
If you’re dealing with baked-on brake dust, use a stronger wheel cleaner that is low in pH. When using these products, ensure that you thoroughly rinse and dry the wheel post-cleaning, as the lingering solution may eat away and damage the wheels or rubber.
Tire cleaning brush
A standard tire cleaning brush will allow you to scrub every nook and cranny of the wheel. These are in stock at any auto parts store.
Streak-free glass cleaner
Be certain to use a glass cleaner that does not contain added scents or dyes. If you need a glass cleaner, consider Stoner’s Invisible Glass. Its foaming action cleans without additives, leaving a streak-free finish. Whether a beginner or an experienced detailer, you can rely on it to deliver a fantastic shine.
Apply wheel cleaner to wheels to loosen up dust and debris.
Begin your wash by focusing on your wheels. The wheels bear the brunt of road damage, battling grime, brake dust, and other roadway contaminants every time you hit the road. Add time and heat into the mix, and you have a recipe for baked-on grime. Spray your wheel cleaner first, and address the other areas of your vehicle as it works to loosen grime from your wheels.
Choosing the right wheel cleaner
Wheel cleaners come in various strengths, and like car soaps, they range in pH. Acidic wheel cleaners are among the strongest available. They’ll effectively remove most baked-on grime. However, you’ll need to carefully monitor the time acidic wheel cleaners spend on your vehicle’s surfaces to ensure they do not cause permanent damage.
Neutral or basic wheel cleaners are less harmful to your wheels and work well for routine cleaning. They do not require close monitoring, making them a safer choice.
Stoner Car Care’s Wheel and Tire Cleaner is a great choice for basic cleanings. Its foaming action helps it cling to your wheels’ vertical surfaces, ensuring a deep, effective clean.
Stubborn brake dust
Of all the substances you may find on your vehicle, brake dust can be particularly difficult to remove. Over time, brake dust embeds itself onto your wheels, making for a tough cleaning task. For tips on removing baked-on brake dust, check out our blog here.
Fill up your buckets
Fill up two buckets with the proper ratio of soap to water. Designate one bucket for clean water and the other for rinsing water to ensure you do not reapply dirt or debris onto your car’s surface.
Add your neutral car soap to your cleaning bucket. You will find dilution information on the back of the car shampoo product you’re using.
Rinse the vehicle
Rinse the vehicle off, working your way from top to bottom. Dust, dirt, and pollen will travel down the vehicle, and working from top to bottom ensures that no dirty runoff goes over previously rinsed areas.
Remember often-overlooked areas in the rinse stage; the roof and the undercarriage. The roof’s finish must contend with precipitation, pollution, sap, and other contaminants, along with the brunt of the sun’s harsh UV rays. Work your way down the vehicle until you reach the bottom. Though it’s difficult to reach under your car, even a light undercarriage spray will offer benefits. During the cold months, road salt can cling to and corrode crucial components of the vehicle. If bending is difficult, try placing a garden sprinkler under the vehicle for an easy, effective rinse.
Along with removing light debris, the rinse step provides additional lubrication that’ll keep your surfaces safe in the following steps.
Wash with car shampoo
Dip your wish mitt in the soapy bucket to absorb car shampoo and water. Rewet your mitt as needed throughout the cleaning process.
Washing techniques
Begin with the roof and move downward on the vehicle, moving from body panel to body panel. We recommend using a side-to-side or up-and-down technique, avoiding circular motions, which may leave streaks. Use very light pressure. The car shampoo will work for you, lifting road dirt, pollen, and other grime. As you clean each body panel, rinse and relubricate your wash mitt.
Revisit wheels
After you finish washing the vehicle’s body, it’s time to revisit your wheels. The wheel cleaner has had time to loosen dirt. To remove grime, take a wheel cleaning brush and thoroughly clean each nook and crevice. If you’re dealing with a particularly dirty wheel, pause to rinse the wheel brush with the hose. Focus on one wheel at a time before moving on to the next.
Rinse the remaining soap
Rinse your entire vehicle from top-to-bottom to remove any lingering soap and debris. While it might seem simple, it’s important to be thorough with this step. Lingering soap can cause spots, streaks, or even damage to your finish.
Dry the exterior
Before you reach for your microfiber, you might want to consider using a dryer aid – especially with delicate finishes.
Drying aids
Drying aids have become a secret weapon among detailers. Typically, they come in a spray-on form. These products add protection and additional lubrication before you dry the vehicle. They’re perfect for protecting delicate finishes and preventing potential scratching, swirl marks, or surface marring. If you’re working with an older car, you’ll want to use a drying aid before you dry.
Prepare your microfiber before drying
To get ready to dry, prepare your microfiber by folding it several times vertically, then horizontally to give you multiple fresh faces to swap between as they get dirty. Cycle between the faces as you dry to ensure an effective dry.
Drying techniques
When drying, use a side-to-side or up-and-down motion; drying towards the edge of the vehicle to wipe excess water and lift dirt away. Do not apply any pressure; simply glide the microfiber towel over the car’s paint.
Water spots
Odds are you’ll encounter water spots at some point during your wash, especially if you’re working in the hot sun or windy weather. Water spots form when hard mineral water evaporates, leaving minerals behind. Most commonly, these appear as chalky, white splotches on your finish.
Freshly formed water spots are easy to remove. Simply reapply a mixture of water and car shampoo to the spot and immediately follow by drying. An old water spot may require additional cleaning methods, such as buffing or removal with a clay bar. For more information on removing baked-on water spots, view our blog here.
Apply a tire finish, removing any excess
After the tires have dried, apply a tire finish to restore that matte black sheen to your tires. Not only do tire dressings look good, but they’ll also help increase your tires’ lifespan. They help restore hydration and offer UV protection against the sun to prevent cracking and fading.
To apply a tire finish, start at the top and move clockwise to cover the entire tire. Don’t spend too much time spraying an area, as excess has the potential to sling if you drive before the product dries. Spray a conservative amount of tire finish around the tire, and add another layer if needed. You shouldn’t need to do more than two full rounds of spraying.
If any tire finish sprays on the paint of surrounding areas, wipe it away with a microfiber towel. If you see remaining residue or grease, apply some clean car shampoo and water to the area, then immediately dry.
Finish with wax or a sealant
Though your vehicle is now clean, nothing stands between your paint and the elements. A wax or synthetic sealant will protect and enhance your car’s newly-cleaned finish.
Waxes and sealants offer various benefits and drawbacks, so it’s essential to weigh the options and choose whichever works best for you.
Car waxes
Those who prefer using natural products often select a traditional wax. The main ingredient in traditional wax is carnauba, derived from Brazilian palm trees on the equator. This natural wax protects the palm leaves from intense heat and moisture. Farmers harvest the raw wax as hard flakes and grind them into a powder. This powder then gets blended with other waxes, oils, and petroleum derivatives to become the products you see on shelves.
Waxes come in various forms to suit your preference: paste, liquid, or spray. The table below highlights the benefits and drawbacks of each.
| PRODUCT | Benefits | Drawbacks |
|---|---|---|
| Paste waxes | ● Typically contain the most carnauba wax ● Produce the deepest color and shine |
● Most expensive ● Degrade the fastest |
| Liquid waxes | ● Longest-lasting of the three main types ● Contain more synthetic ingredients that improve lifespan |
● Can be the hardest to apply ● Requires lots of buffing |
| Spray waxes | ● Easiest to apply ● Affordable ● Excellent for basic touch ups or routine cleaning |
● Only last a few weeks at most ● Can be messy if not applied carefully |
In addition to being the more natural protective product, a wax provides a warm glow and greater depth to a vehicle’s paint job.
Synthetic sealants
Unlike naturally-occurring waxes, chemical engineers develop synthetic sealants in labs. Ingredients vary from product to product, but most sealants contain petroleum derivatives, polymers, and resins. Sealants create a transparent shell on top of your vehicle’s paint to protect it from outside grime and debris.
Like waxes, sealants can come in several forms. Most commonly, you’ll find sealants as pastes. Artificially developed sealants are typically easier to apply than traditional waxes and last much longer.
While waxes produce a warm glow, sealants create a cooler, glossier shine that some call a “futuristic” finish.
Both products will enhance your paint job, and it all comes down to user preference. If you’re hoping for a warm, natural finish, use a natural wax. However, sealants are the way to go if you prefer longer-lasting protection. Regardless of your choice, make sure to apply a protective product.
Buffing techniques
Regardless of which product you use, you’ll have to do some buffing to adhere it to your exterior correctly. You’ll want to use an applicator pad or microfiber towel for this step. To buff, use circular motions, slowly moving down each panel using a uniform, light pressure. If you’re using a spray variant, apply a conservative amount and add as needed. Too much product will require additional buffing and cost you more time.
Detail your glass and windshield
It’s time to finish the exterior detailing with a thorough glass cleaning. We recommend choosing a streak- and scent-free glass cleaner, such as Stoner’s Invisible Glass. Its tint-safe formula will effectively remove any leftover residue or spots.
Begin with the windshield. Lift the wipers to give you access to the entire area. A little cleaner typically goes a long way, so apply it to the windscreen in a thin, even layer. Quarter a microfiber towel, and use long, straight motions to dry and clean the surface.
Optional: Reach & Clean Tool
Windshields on big vehicles can be challenging to reach, which is why tools like the Reach & Clean can come in handy. The Reach & Clean uses cleaning bonnets and a long handle to get to the areas that otherwise break your back. Simply spray cleaner onto the glass, and wipe in straight motions with the tool for a spotless, streak-free clean.
Passenger windows
Before applying cleaner to passenger glass, roll down each window approximately a quarter of the way. Spray your glass cleaner into a microfiber towel and run it across the window’s top edge. The top of a window rarely gets cleaned; this technique ensures you’ll get every part of your glass. Once you’ve cleaned the top of each window, roll the panes back up and continue cleaning as usual. Spray a conservative amount of glass cleaner to form an even layer, and then use a microfiber towel to remove the cleaner, using side-to-side wiping motions.
Alternative products: Ceramic coatings and rain repellents
The time to add additional products such as ceramic glass coatings or rain repellents is when you have a crystal-clean car. For more information on applying glass-ceramic coatings, view this post. To learn more about repelling rain, check out this edition of our blog.
Achieve a spotless exterior!
The secret to keeping a clean car is to make cleaning a routine. The more often you wash your vehicle, the less work you’ll have to do to maintain it. It’s really that simple!
If you follow this post’s basic steps to washing your car, you will have a spotless exterior that will enhance and protect your vehicle from whatever it encounters on the road. Happy detailing, and enjoy the ride!


